Hello!!
Another super easy nail art tutorial called
✪ Funky Zebra Nails ✪
Have you ever had problems with nail art cause you left hand doesn't wanna listen to your brain and you'll end up with one hand looking fab and the other hand looking like a mess?
Yes. Out everyday dilemma.
But me, myself and I have created a super simple yet cute nail art which I guarantee will be successful.
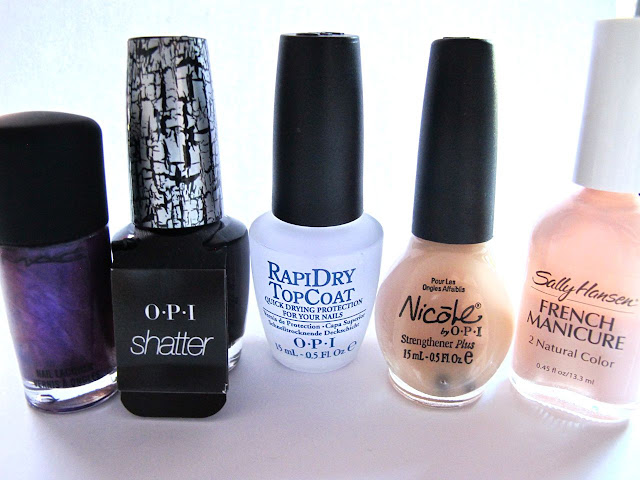
You'll need:
1. Purple nail polish.
2. Shatter nail polish.
3. Peach nail polish.
4. Base coat + Top coat.
5. Office tape (yeap, you read me right.)
✽✽✽
Now let's get started!!
Step 1:
Start with base coat to protect nails from yellowing and also your peach nail polish to give nails a more healthy colour.
Step 2:
Cut your office tape and tape them on your nails into a french manicure style. Make sure there are no air bubbles or you won't get a solid colour line.
➸ Important!! Make sure your base layer is dry or else when you peel off the tape, the tape will lift up your base colour.
Step 3:
Paint on your purple. Paint as many layers as you want to achieve your desired shade of purple.
Step 4:
Peel off your tape. Satisfying eh? You could either end here with a top coat or leave the tape on and continue on with the shatter nail polish.
Step 5:
Paint on your black shatter nail polish and let it dry before peeling off the tape. Finish up with a top coat and start rocking your funky nails!
✿ p.s. I put the tape slightly lower because I wanted a slightly bigger shatter surface. Hence, you may notice a gap. =)
I hope you liked this simple tutorial.
Tell me how did yours turned out eh? I'd love to hear from you!!
Cheers!!
♡ ♡ ♡
M.May


Nice! The Sally Hansen polish looks good..
ReplyDeleteThank you! The Sally Hansen one is actually very very sheer and I'm not a big fan of it. Heh. I haven't tried natural colours from other brands tho so can't say much about that. =)
ReplyDelete@Isabel